RIMMF Installation
For complete installation instructions, select the “Download” topic in the sidebar on the left.
In general, download the software package, and when the download is complete, double-click on the downloaded file to install RIMMF. When the installation is complete, there should be an icon for RIMMF on your desktop.
Double-click on the RIMMF icon to start the program.
Details
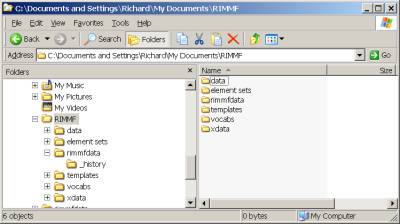
Here is a snap of the folder RIMMF will put in your My Documents, with the sub-folders on the right:
These folders are where all of your work in RIMMF will be saved.
data
This folder stores the “records” that you will create in RIMMF. In the current version, all records are stored in either plain text, or XML. This folder will be empty until you make some records.
element sets
This folder, which is subdivided by the RDA entities, contains the default element sets for each entity. Again, as with all files in RIMMF, these are simple tab-delimited text files.
rimmfdata
This folder contains the data that is used to populate the tables in RIMMF. You could theoretically load these files into a program like Excel if you knew what you were doing. Whenever you change the property of an element in RIMMF, or add a new element or caption yourself, that change will be saved in this folder.
templates
This folder, which is also subdivided by the RDA entities, contains the templates that you will use to create records in RIMMF. It is empty until you make some templates. The default template for each entity is basically a copy of one of the element sets (see above).
xdata
This folder is something that we are working on and, if present at all, will be empty.
![[RIMMF6]](/w/lib/tpl/dokubook/images/dokuwiki-128.png)

